Unlock the potential of modern communication with our advanced 2 Wire IP Solutions, designed to streamline connectivity and enhance your digital experience.
1. How It Works
2. Installation Steps
3. Configuration Modes
4. Pairing & Unpairing Units
5. Additional Tips
2 Wire Converter Guide
LanPoE 2-Wire Converters deliver modern Ethernet and PoE functionality using legacy 2-wire infrastructure. Whether you’re connecting an IP intercom, camera, or access device where standard cabling isn’t feasible, this guide walks you through the full process, from initial install to advanced multi-device configuration.
How to Use LanPoE 2 Wire Converters
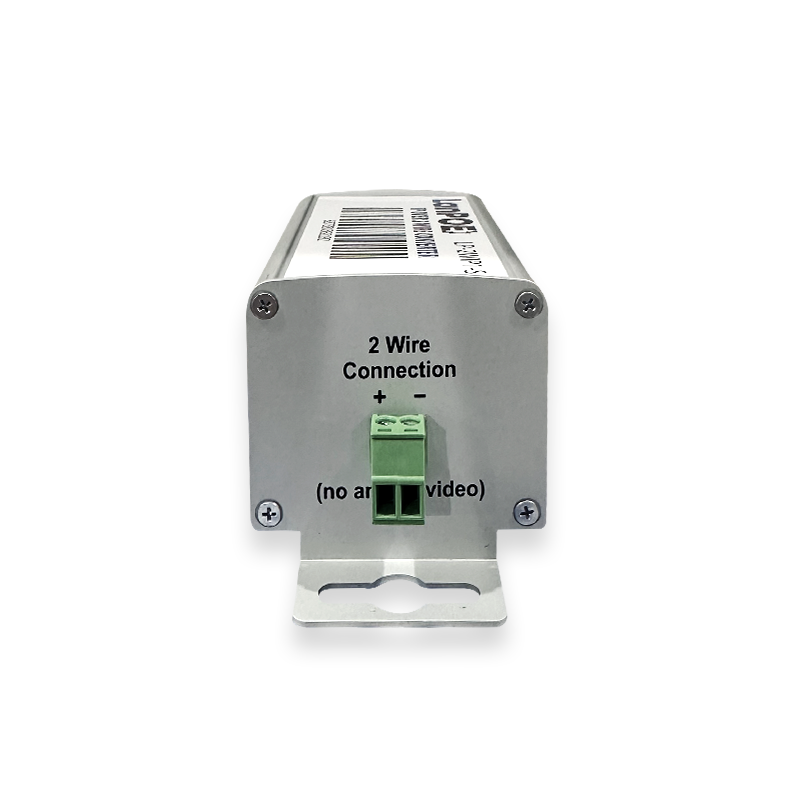
2 Wire Converter Breakdown
LanPoE 2-Wire Converters enable you to transmit Ethernet and power over existing two-wire cabling, ideal for retrofitting systems in older buildings or extending reach beyond standard Ethernet limits. One converter connects at the source (Leader), the other at the endpoint (Follower).
Key Features
Data + PoE over 2 wires (no new cabling required)
Auto-negotiation, no IP addressing or network setup
Distances up to 750m
Plug-and-play simplicity
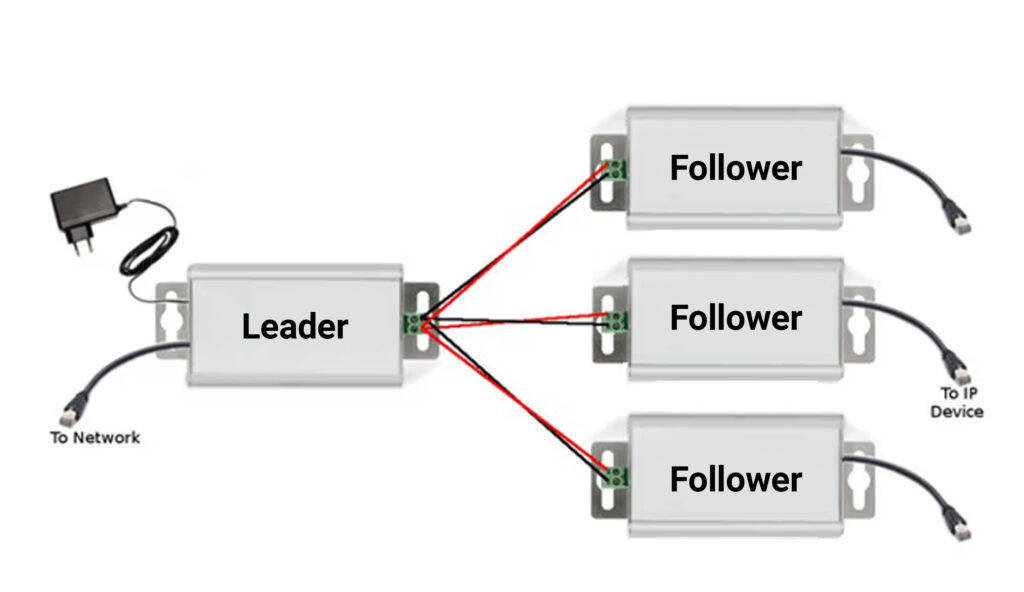
Supports up to 3 followers per leader
Fully reversible unit roles (either unit can be a leader)
What's in the Box?
Each LanPoE 2-Wire Converter kit includes:
2 converter units (identical – either can act as Leader or Follower)
1 AC power adapter
Installation Steps
1. Identify Locations
Place the Leader unit at the point where your Ethernet network ends and the 2-wire cable begins.
Place the Follower unit at the remote location where Ethernet is needed again.
Flexible Role Assignment
Leader = connected to the power supply
Follower = receives power over the 2-wire line
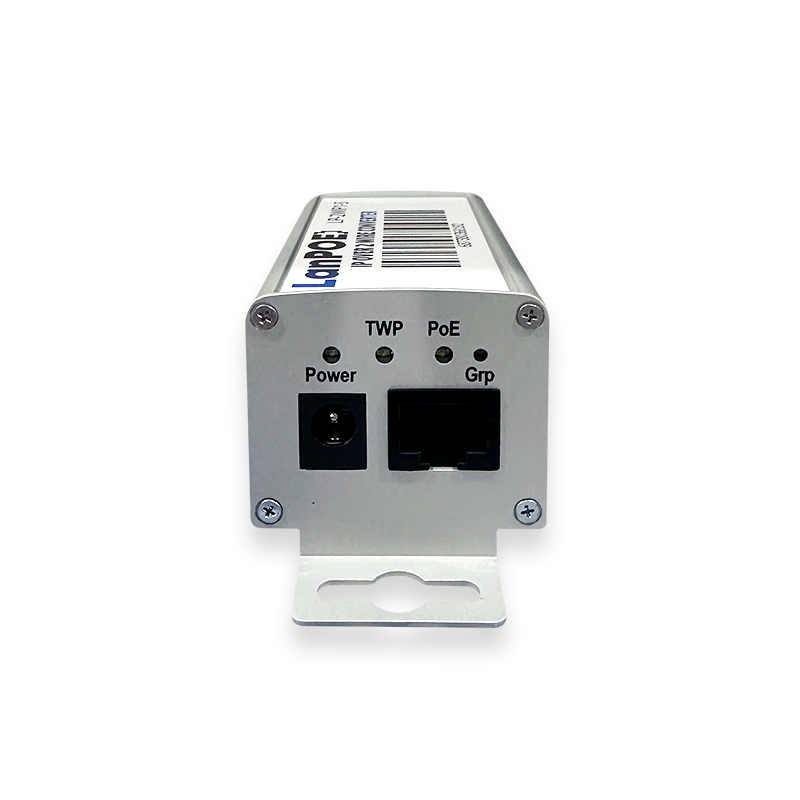
2. Connect the Hardware
On the Leader side:
Plug in the Ethernet cable to the RJ45 port.
Connect the provided power supply.
Attach the 2-wire cable.
On the Follower side:
Connect the other end of the 2-wire cable.
Plug in your IP device via Ethernet (intercom, camera, etc.).
Configuration Modes
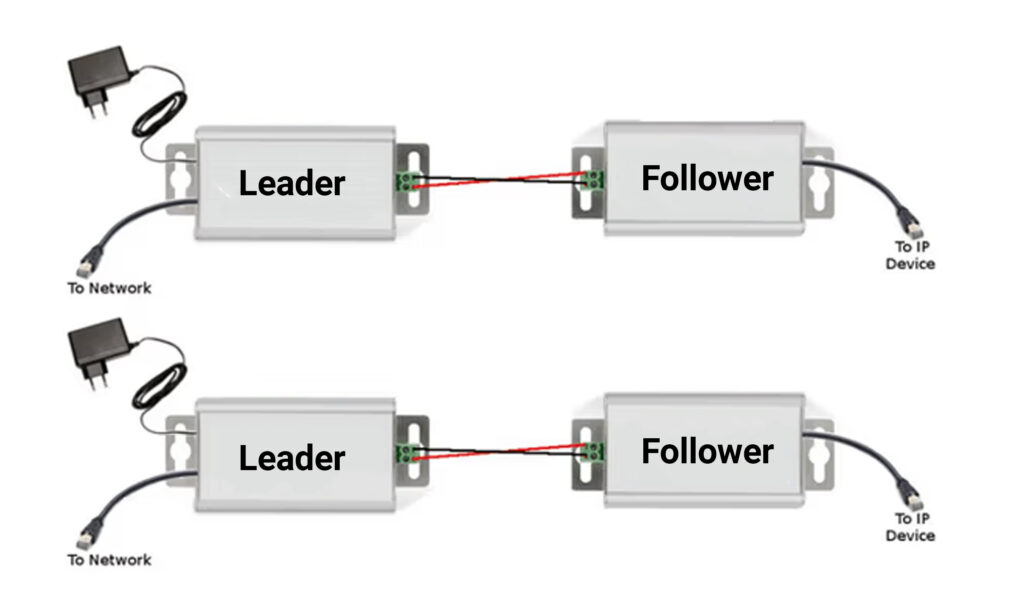
Default Plug & Play
Single Leader + Single Follower: No setup required—works right out of the box.
Perfect for one intercom to one monitor setup.
No pairing needed—just wire up and go.
Single Leader + Multiple Followers (Max 3): Works out of the box as long as wiring polarity is correct.
Example: One door station to multiple monitors.
Up to 3 Followers can connect to one Leader.
Ensure polarity is correct across all devices.
Advanced Config: Multiple Leaders
If installing multiple Leader units within the same network (e.g. multiple intercoms or door stations), you must perform pairing/unpairing procedures to prevent IP conflicts.
Example: Building with multiple IP endpoints all routing back to a single switch.
Must pair/unpair each Leader-Follower group to avoid signal collisions.
Pairing & Unpairing Units
Pairing Units
Required when using multiple Leaders on one network or to reassign units.
Power the Leader and connect the Follower via 2-wire (still offline from the LAN).
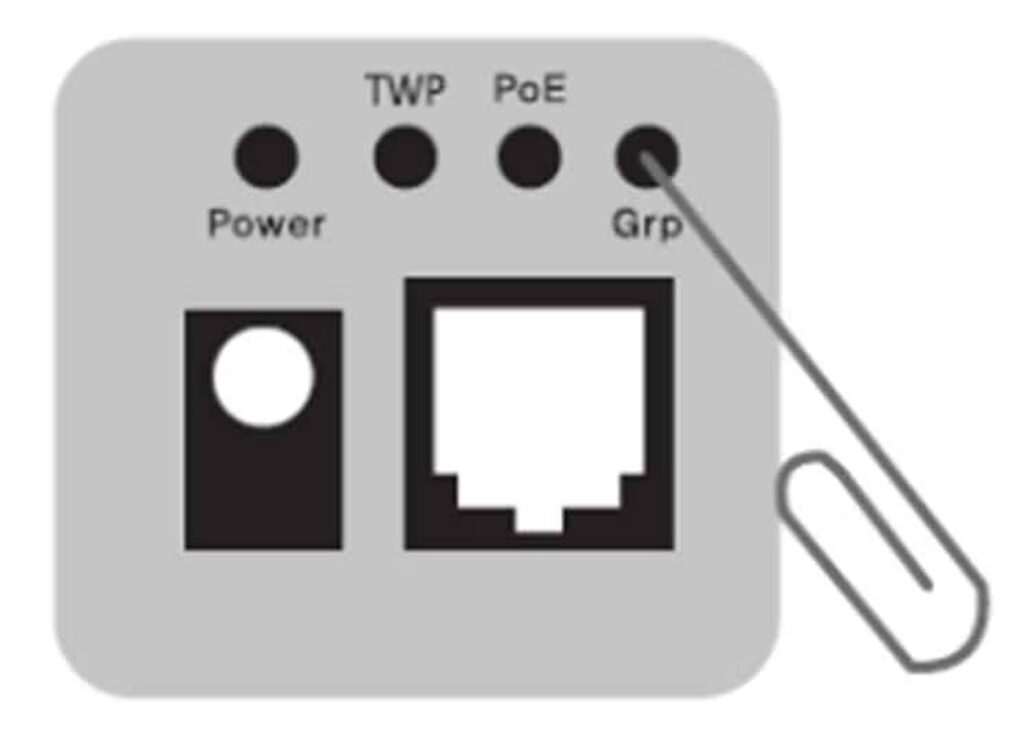
Press the ‘Grp’ button on the Leader for 2 seconds.
The PoE LED will start blinking (seek mode).
Press the ‘Grp’ button on the Follower for 2 seconds.
When the TWP LED lights solid, the units are successfully paired.
For multiple Followers per Leader: Pair each one individually while all are wired and powered. Activate pairing on the Leader before each Follower.
Unpairing Units
Used to reset units before installing into a network with multiple leaders.
Connect the Leader to power.
Connect a Follower via 2-wire (but do not connect to the LAN or IP device yet).
Using a small tool (paperclip or pin), press and hold the ‘Grp’ button on the unit for 10 seconds until all LEDs turn off.
Only the Power LED should remain on.
Repeat for each unit to reset them.
Additional Tips
General
Always label wires for polarity if unsure.
When deploying multiple units, perform all pairing steps before connecting to your network.
Test for PoE and data transmission before mounting devices permanently.
Note: Always maintain wire polarity. Positive to positive, negative to negative.
PoE Port Warning
DO NOT connect LanPoE units directly to PoE-enabled switch ports. If your switch lacks non-PoE ports, ensure PoE is disabled on the port used for the converter.
Power and LED Indicators
Power (Blue): Indicates unit is powered on.
PoE (Green Flashing): Unit is in pairing/seek mode.